How to Use Stampwheel Accessories
Hidy Ho Stampers,
May 16, 2023. Today Teaspoon of Fun is bringing you not only the StampWheel but the accessories that go along with it. Make sure you pick yours up before they go on backorder. The StampWheel is the most versatile piece of stamping equipment I own. I LOVE it! And there are no magnets involved. It’s so awesome.
Let’s take a look at the video for this card to show you just how easy it is to make and put together using our StampWheel….
Click on the picture above or CLICK HERE to view the video.

Make sure you watch the video above!!!
StampWheel Center Alignment Guides
StampWheel Replacement Sticky Mat: Grid
Botanical Wreath Builder Combo
Sprinkles Scallops Rectangle Die Set
Copic Markers – Colors I used were Y08, Y17, E15
Hybrid Ink – Colors I used were the Black, Lime and Pine

Make sure you watch the video above!!!
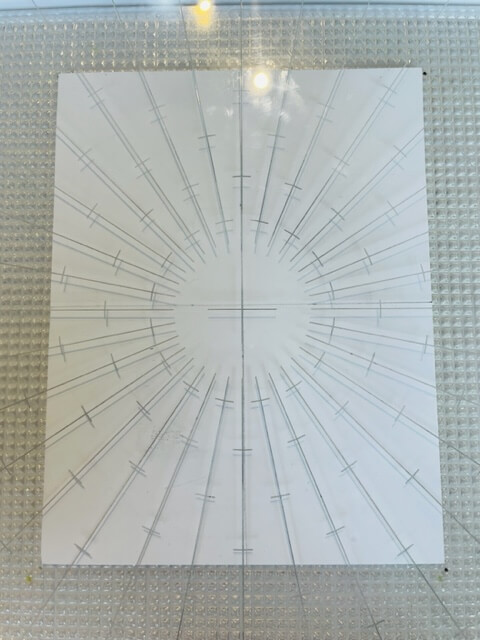
The first thing you are going to do is line up your card stock using the grid on the top plate and the brand new StampWheel Center Alignment Guides. It’s sooooooo easy and it sticks to the mat WITHOUT MAGNETS!!!!!

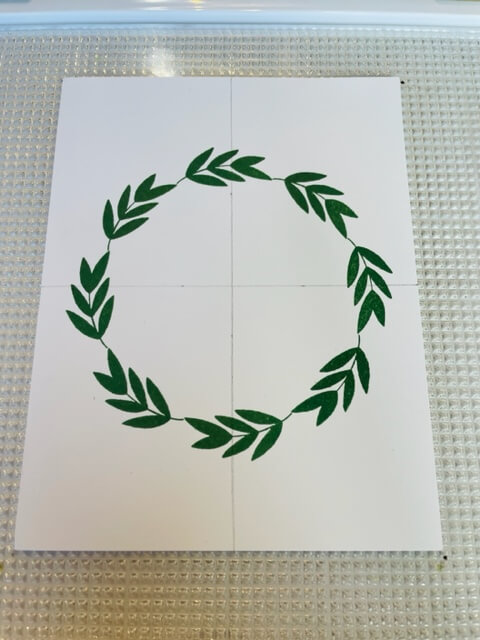
No more having to measure lines to get the center!!! The StampWheel Center Alignment Guides are perfect for this alignment. I used the Botanical Wreath Builder for these ferns. This is the first layer (make sure you watch the video). I used our Hybrid Ink for the wreath and the sentiments. Make sure you use our Stampendable to get an even ink saturation.

Here is the second layer. You don’t have to use the pencil grids any more but I wanted you to see just how perfect the guides help you line everything up. I just LOVE IT!!!!! It’s GLORIOUS!!!!

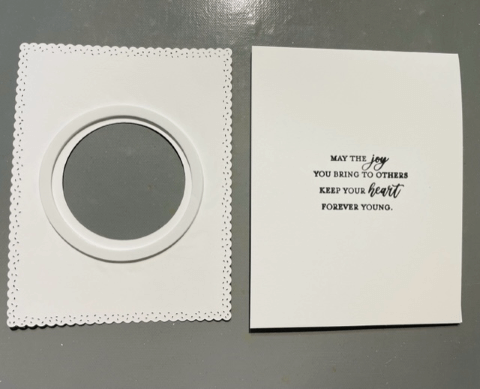
After you stamp the wreath, use the Sprinkles Scallops Rectangle Die Set to cut out the decorative frame.

Use your Cross Stitch Nesting Circles to cut out the center of the wreath.

Using one of the sentiments from …Doubles Our Joy Sentiments OR

one of the sentiments from Delightful Day Sentiments and stamp in the middle of the circle (MAKE SURE YOU WATCH THE VIDEO)

Using our White 3D Foam Circle Frames and our White Crafty Foam Tape pop up the top layer. I used our 6″ Haberdashery Scissors to trim the White Crafty Foam Tape.

Color the Little Layered Asters with Copic Markers and curl with our with our Crease Tool. Using the Deluxe Adhesive and our Regular White Foam Squares add these little flowers to the wreath.
What did you think? Isn’t this the coolest tool you’ve seen in a while? It’s so versatile and I LOVE that you don’t have to use MAGNETS!!!! Get yours today at www.TeaspoonOfFun.com/
Thank you for letting us come into your home and spend a little crafty time with you! It’s so much fun sharing what is such a passion. If we can ever help with any of your stamping needs, please reach out to us, we are here to help and teach, that’s what we love to do. It doesn’t have to be hard, it doesn’t have to be complicated, just fun and thoughtful. All products can be found in our Teaspoon of Fun Shoppe. Happy Crafting today!
Remember to share it, pin it, buy it and let us know what you think.
(((Hugs)))
* * * * * * * * * * * * * * * * * * * * * *
How to Use Stampwheel Accessories
We have so many new products in the shop. Make sure you check it all out at Teaspoon of Fun. We have a small company but there is a lot of love put into it! Thank you for your support. Thank you for taking time out of your busy day to spend a little of it with us. If you have any questions, please let us know! In the meantime, take a few minutes and send someone you love a hand-stamped card with a little note in it. I KNOW they will love it! All products are listed in the menu below. Just click on the items you want and add them to your cart! It’s that simple! Thank you for supporting our small business.
How to Use Stampwheel Accessories

Leave a Reply