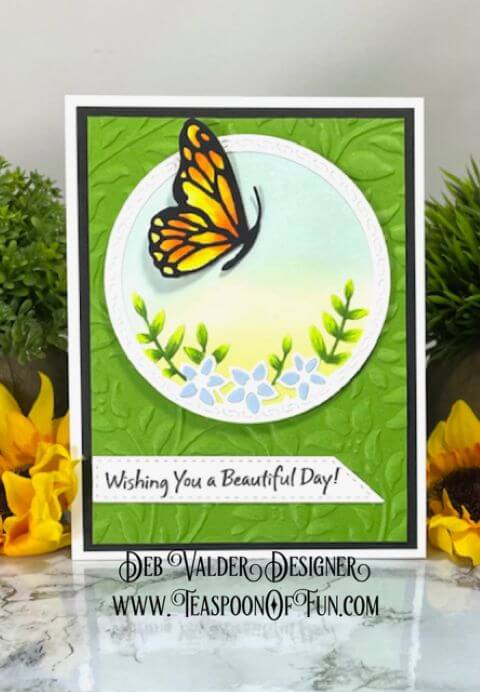
Side Butterfly Circle
Hidey Ho Stampers,
August 9, 2025. Today Teaspoon of Fun is bringing you a “Simply Simple” card. Fast and beautiful. Before I show you what we have, just a reminder to make sure you check out the SALE ROOM we are adding new items all the time.
Head on over to Teaspoon of Fun for all your paper crafting needs
and share this site with your friends!
Let’s take a look at what I picked for you today…
Gracious Leaves 3D Embossing Folder
or the Fallen Leaves 3D Embossing Folder
I used Twisted Citron and Speckled Egg
Butterfly: Y02, Y17, YR04, YR18, 110 (black)
Leaves: YG01, YG13, YG17

This is so simple and gorgeous to put together.

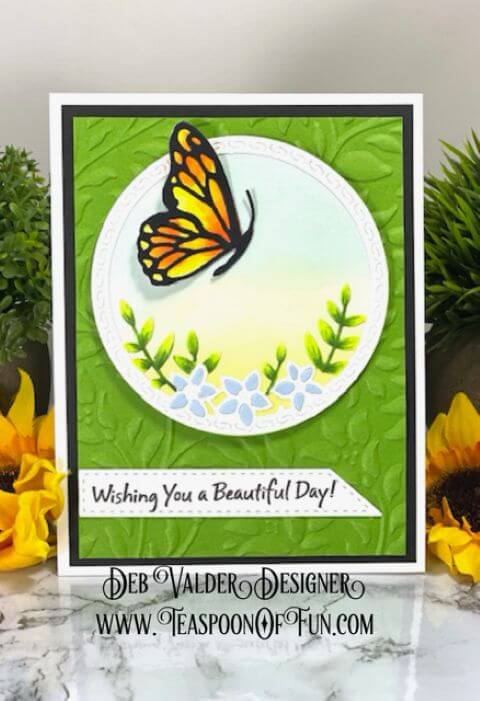
Cut a circle from the Double Stitched Circle Die. Use your Distress Oxide Inks and Blending Brush to create this beautiful sunset. Then use your Silicone Brush Cleaner and a little water to clean the blending brushes free from ink.
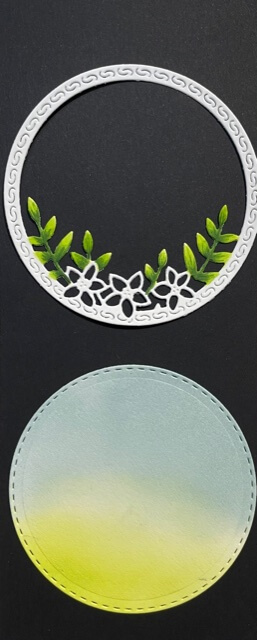
Cut out the Side Butterfly Circle from white card stock and color your leaves with the Copic Markers. Color the butterfly background with the Copic Markers colors you want your butterfly to be and color the outer butterfly with the Black 110 Copic Marker.
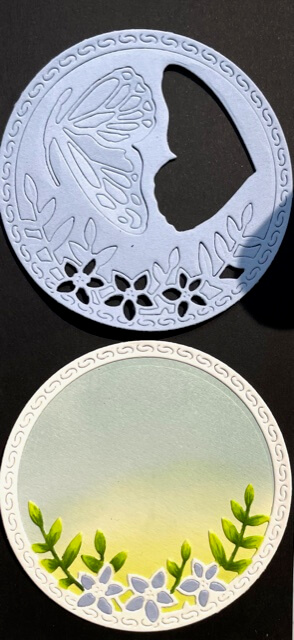
Add the Side Butterfly Circle to the Double Stitched Circle Die using the Precision Glue Press. To create the flowers, I cut a butterfly die with the color flower I wanted (I used light blue cardstock). I put the rest of the die cuts in the die envelope to use for another projects. I only need the flower petals for this card. Put your Deluxe Adhesive IN the FLOWER (don’t put it on the petals). Then take your Jewel Picker, pick up one petal at a time (so you know where it goes) and place in the correct spot on the die cut where the adhesive is. SOOOOOO easy!
Emboss the Gracious Leaves 3D Embossing Folder (it’s a little different from the one here but I love it.) You could also use the Fallen Leaves 3D Embossing Folder that look it so beautiful also . Remember to SPRITZ your paper lightly with our Mini Mister before you run it through your machine so the fibers “mold” to the pattern. It’s GORGEOUS!!! Add this to the card base. Put your butterfly together using the Precision Glue Press and add that the to the circle. Pop your circle using the 3D White Foam Circle Frames and add it to your card base over the embossed layer.
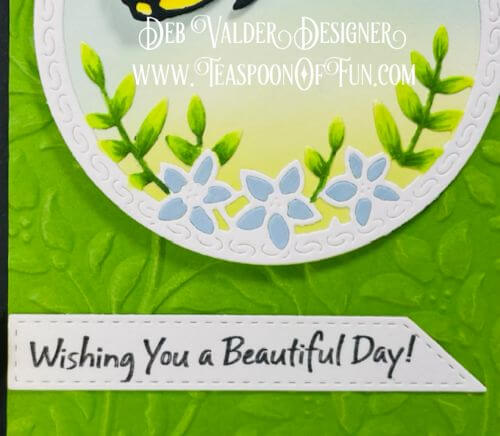
Use your STAMPWHEEL to stamp the sentiment Wishing You A Beautiful Day and cut it out with the Quick Strips Dies. Add this to your card at the bottp,/ I’m wishing you a beautiful day today and an even better tomorrow! (((hugs)))
Add your card to one of our A2 White or A2 Cream Envelopes and mail it off to your dear friend.
* * * * * * * * * * * * * * * * * * * * * *
Some basic supplies you should definitely have in your craft room…..
* * * * * * * * * * * * * * * * * * * * * *
Thank you for letting us come into your home and spend a little crafty time with you! It’s so much fun sharing what is such a passion. If we can ever help with any of your stamping needs, please reach out to us, we are here to help and teach, that’s what we love to do. It doesn’t have to be hard, it doesn’t have to be complicated, just fun and thoughtful. All products can be found in our Teaspoon of Fun. Happy Crafting today!
Remember to share it, pin it, buy it and let us know what you think.
(((Hugs)))
* * * * * * * * * * * * * * * * * * * * * *
Side Butterfly Circle
We have so many new products in the shop. Make sure you check it all out at Teaspoon of Fun. We have a small company but there is a lot of love put into it! Thank you for your support. Thank you for taking time out of your busy day to spend a little of it with us. If you have any questions, please let us know! In the meantime, take a few minutes and send someone you love a hand-stamped card with a little note in it. I KNOW they will love it! All products are listed in the menu below. Just click on the items you want and add them to your cart! It’s that simple! Thank you for supporting our small business.
Side Butterfly Circle

I participate in several affiliate programs. That means that I receive a commission when products are purchased through links here at this blog (at no cost to you). Please know I will never share or even review product that i would not personally recommend or that I do not personally like.
Leave a Reply