Hidy Ho Stampers,
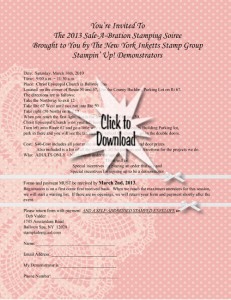
Yippppppeeeee It's time for Stamp Camp again. This year's theme for all 4 Stamp Camp's is "Join us for our Stamping Soiree"! Click on the form below, fill it out and mail it in asap. We fill up fast! There is stamping (of course), food (mmmmmmmm) and lots and lots of prizes and giveaways! We will have the prize wheel again so you can spin for prizes and a few more surprises in store for you (and you know there is never a dull moment with me at the wheel)! So click on the picture, fill out your form and mail it in along WITH your self-addressed stamped envelope! Hurry.
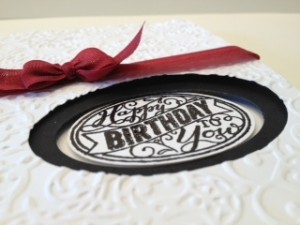
Today's Quick, easy, simple, speedy card is made with one of the stamps from the BEST OF series. This is a series of stamps that will be rolling out each month for the whole year to Celebrate Stampin' Up!'s 25th Anniversary. Click here to see more details about the promotion (you'll need to scroll through my dinner pictures first :0). Anyway, this is the card I made for those that have joined my "Oldies but Goodies" group. I hand-stamp them a card for each month they buy that stamp set and mail it out to them! I love this one.
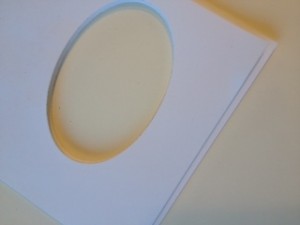
So here is a shot to show you there is a hole in the card :0)!
Flat boring picuture but needed to show you what it looks like closed.
ooooooooooo aaaahhhhhhhhh…see all the layers?
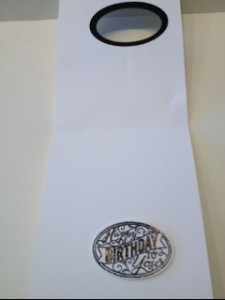
Then when you open it, the stamp is on the back of the card base.
Here are a few pointers. When you cut out the oval with the NEW Oval framelits, put your base card and your 4" x 5 1/4" together and cut them together. See more of the directions below.
The size of the black piece that is layered or "sandwiched" in between the white ovals is 2 1/4" x 3 1/4" then I punched out the smallest oval in the set.
Supplies:
Stamps Set: NEW The Best of Birthdays #132929 clear mount only
Card Stock: Whisper White and Basic Black
Ink: VersaMark
Accessories:
NEW #129381 Ovals Collection Framelits (if you buy the Oh, Hello Bundle #131102 wood mount or #131101 clear mount, you will get the bundle which includes the framelits for 15% off)! It's totally worth it.
NEW #127819 Lacy Brocade Textured Embossing Folder (it was the folder that was in the Holiday Catalog and carried over)
#109133 Black Stampin' Embossing Powder
#119859 Extra Large Oval Punch (which coordinates perfectly with this stamp and complements the Ovals Framelits)
#120922 Cherry Cobbler Seam Binding Ribbon
Dimensionals and Glue Dots were also used (click here to find out how to get all your adhesives in one bundle)
Directions:
Take a piece of Whisper White Card Stock that measure 4 1/4" x 11" and score it at 5 1/2, this will be your base card.
Take a piece of Whisper White Card Stock that measures 4" x 5 1/4" and temporarily adhere this to the front of your base card. Run it through the Big Shot with the #2 Oval. Then run this piece through the Big Shot with the Lace Brocade Embossing folder (make sure you do it in this order or your Lacy Brocade design will flatten out a little). Wrap your 5" piece of Cherry Cobbler Seam Binding Ribbon around this layer. Put Stampin' Dimensioanls on the back and set aside for just a moment.
Next cut a piece of Basic Black Card Stock that measures 2 1/2" x 3 1/2" and center the smallest oval #1 on this piece of black. Run it through the Big Shot. Adhere this to the Base card with snail adhesive (hint open up the card to center see photo #4 above).
Now add the top layer to the base card that has the black oval on it.
On a piece of Whisper White scrap paper, stamp the Best OF Birthday stamp with Versa Mark ink. Add black embossing powder and heat with your heat tool. Punch this out with your extra large oval punch. Put dimensionals on the back. With the card closed, slide this punched piece through the hole to adhere.
Now add a fork bow and you are DONE!!!!
I thank you so much for taking time out of your day to stop by and see me! What a nice person you are! Thank you and don't forget to get all your stamping supplies at www.stampladee.stampinup.net! I'd love to have you stop by the store and just shop til you drop.


Leave a Reply