Sweet Sunrise Silhouette Card
Hidy Ho Stampers,
April 7, 2022. Today’s cards from Teaspoon of Fun are GORGEOUS using the Ombre Technique (having a pattern in which colors or tones fade into one another) and some amazing colors. Let’s take a look at what I picked for you today…
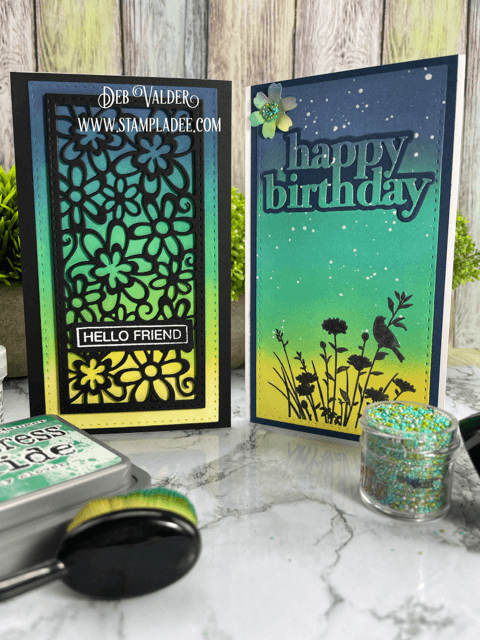
Ingredients for each of the cards are below – they both use the new Ombre look but…..
LOOK at how different they look using the same technique!
First let’s learn this unique way to do the Ombre Technique here….
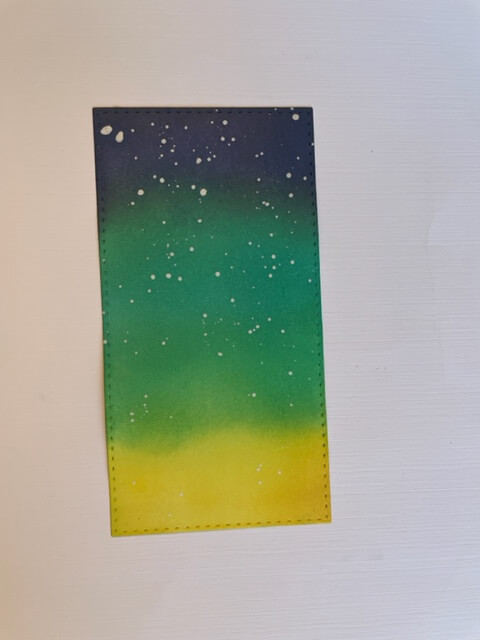
Step 1 – Cut this layer out of the Slim Mini Flower Patch Die.

Step 2 – Starting at the top, with your darkest color Distress Oxide (Chipped Sapphire) burnish your color in using your Blending Brushes and smooth circles. Load up the color on your brush – RE-INK your pad if you need to. We have every color of re-inker in the SHOP to match your Distress Oxide pads – when you order the pad you may want to order the re-inker and you will never be left high and DRY ever again! Next I used Peacock Feathers. Make sure you OVERLAP the colors and really blend them in. The third color layer is Lucky Clover and the final color is Fossilized Amber.
Step 3 – Mix a drop of White Brilliance Ink Refill with a little water from your Silicone Dispenser in your Paw Palette. Pick up some of this mixture onto your #4 Watercolor Brush and tap it on your card layer over the distress oxide colors. The amount of pressure you use is going to determine how much you get on your paper and how big the droplets are going to be. Start out soft and adjust to your preference.
Step 4 – That’s it!!! It’s so pretty and there are so many options you can use with your Distress Oxides!! Give it a try.
Let’s take a look at the first card I have for you today using this technique:
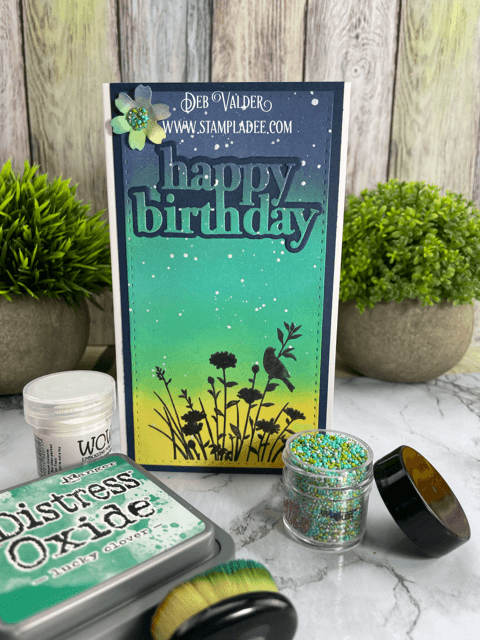
Happy Birthday Chunky Layered Die
Distress Oxide – Chipped Sapphire
Distress Oxide – Peacock Feathers
Distress Oxide – Fossilized Amber
Let’s take a look at putting together card #1:

Step 1 – After you create your Ombre piece, you will want to cut out the top layer of the Happy Birthday Chunky Layered Die. You pick what colors you want from this card layer that you just created and lay your die on that piece. Now you have an Ombre sentiment that MATCHES!
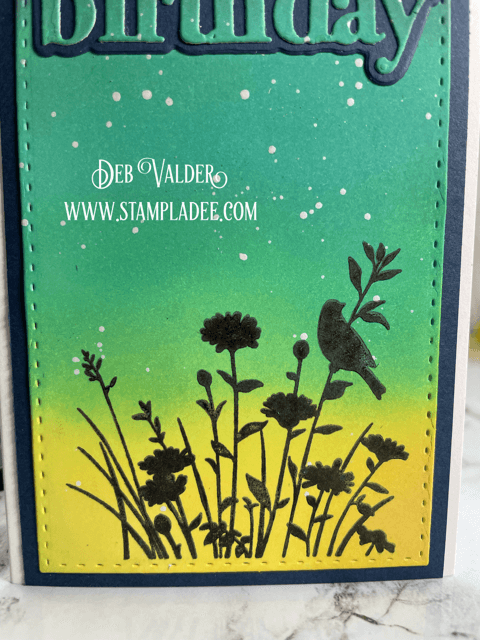
Step 2 – Stamp your image on the bottom using our Black Hybrid Ink pad. You want to use a permanent ink and let it dry (or you can hit it with a Heat Tool to make sure it is set up).
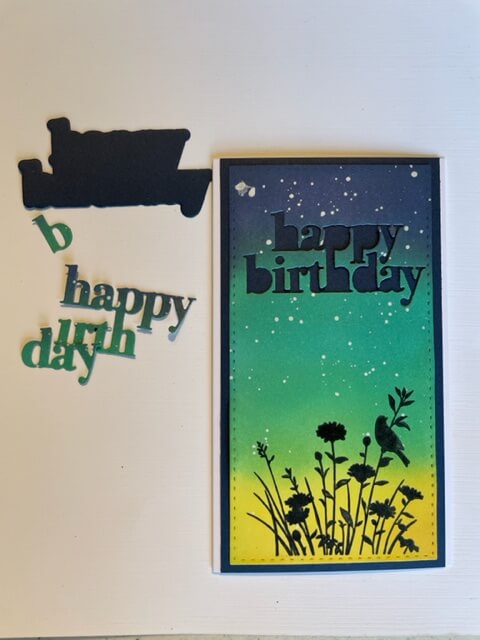
Step 3 – Before you adhere the Ombre layer to your card, CUT OUT the “silhouette” piece from this second layer (mine is from Stone Blue). Use caution that it is not going to be visible to the upper layer. In this sample, I cut it out at the bottom of of the Stone Blue where the flowers are. Now you have your silhouette and your words and you saved so much paper.
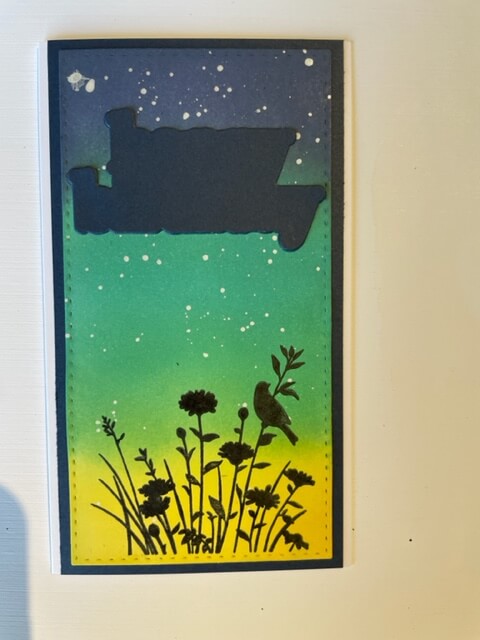
Step 4 – Layer your card base, then your colored card stock (the one with the silhouette cut out) then your Ombre layer. NOW take your “silhouette” and put it over the cutout words to cover them up.
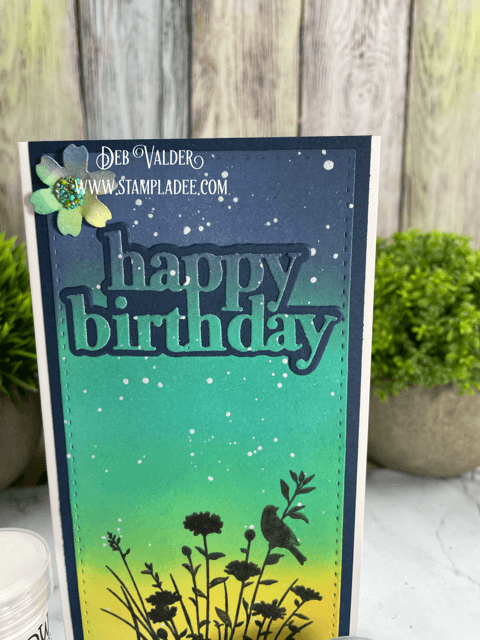
Step 5 – The Happy Birthday Chunky Layered Die is one of our Silhouette Dies in our shop. The underlayer is a coordinating die with the words above. We have several of them in the shop. Put this “happy birthday” over the silhouette.
Step 6 – The flower is a “leftover” from the Flora Plate Die. I always save anything that is whole and reusable. So I picked out a flower, brushed it with the same colors as the card, curled it with my Crease Tool and added it with our Deluxe Adhesive to the card layer. For the middle of the flower, I added our Crystal Glaze and our Seas the Day Prills using our Craft Spoon.
And it’s done!!! SOOOOOOOO PRETTY!!!
Now let’s take a look at card #2 using this same Ombre look….
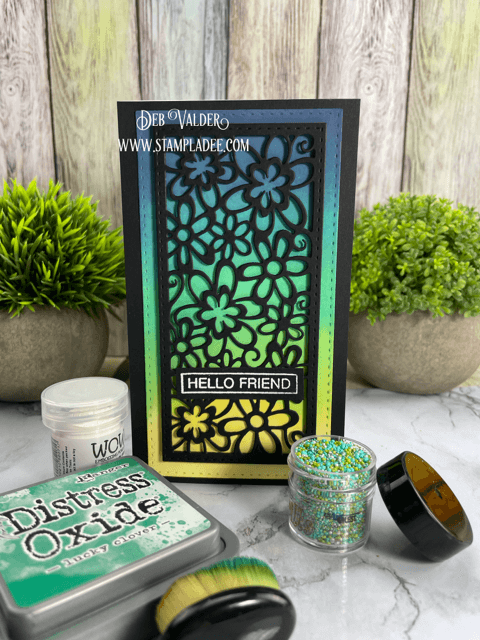
Awesome Ticker Tape Sentiments Combo
Distress Oxide – Chipped Sapphire
Distress Oxide – Peacock Feathers
Distress Oxide – Fossilized Amber
Super Fine Bright White Embossing Powder
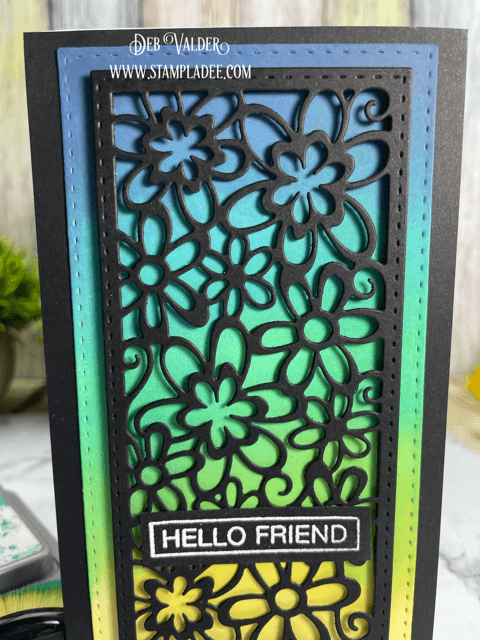
Slim Mini Flower Patch Die is the die I used for both the Ombre layer and the flower layer! I love these new dies we have in the shop. It showcases not only the beautiful flowers but it also allows you to see your beautiful work underneath. If you used designer paper, it would show off your paper and the flower outline!

Before I heat embossed it, I used our Powder Tool Applicator on my card stock so the embossing powder didn’t stick to places it shouldn’t. It’s a very controlled tool which I love. You’re not getting powder everywhere. After you apply the powder, stamp with our WOW Ink , pour the Super Fine Bright White Embossing Powder and heat with your Heat Tool. To put the card together, I used our Black 3d Foam Strips. I used black because the frame is black. (I always tell you to have one of each of our adhesives on hand so when it calls for it, you have it!)
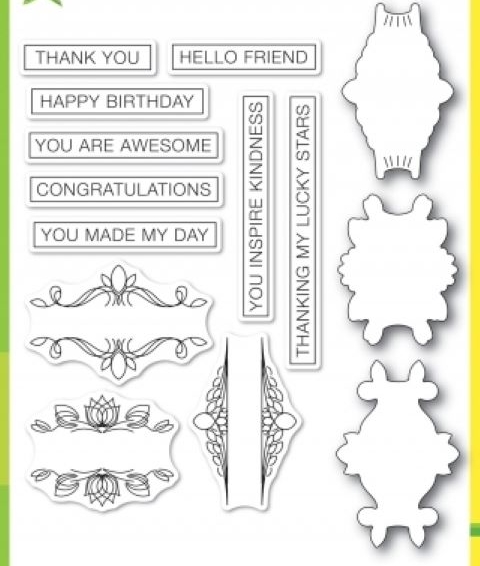
I used Awesome Ticker Tape Sentiments Combo for this card. It not only has sentiments, it has the dies to match some of the pieces in the set.
I love this technique and I just love sharing this passion with you.
I hope you like what I picked for you today!
* * * * * * * * * * * * * * * * * * * * *
Sweet Sunrise Silhouette Card
Thank you for letting us come into your home and spend a little crafty time with you! It’s so much fun sharing what is such a passion. If we can ever help with any of your stamping needs, please reach out to us, we are here to help and teach, that’s what we love to do. It doesn’t have to be hard, it doesn’t have to be complicated, just fun and thoughtful. All products can be found in our Teaspoon of Fun Shoppe. Happy Crafting today!
Remember to share it, pin it, buy it and let us know what you think.
(((Hugs)))
* * * * * * * * * * * * * * * * * * * * * *
Sweet Sunrise Silhouette Card
We have so many new products in the shop. Make sure you check it all out at Teaspoon of Fun. We have a small company but there is a lot of love put into it! Thank you for your support. Thank you for taking time out of your busy day to spend a little of it with us. If you have any questions, please let us know! In the meantime, take a few minutes and send someone you love a hand-stamped card with a little note in it. I KNOW they will love it! All products are listed in the menu below. Just click on the items you want and add them to your cart! It’s that simple! At check out, you can use PayP
al OR keep following the PayPal prompts until you get to the credit card section (you don’t need PayPal to check out – that’s just our processing company – we accept Visa, MC and American Express). Thank you for supporting our small business.
Sweet Sunrise Silhouette Card
I participate in several affiliate programs. That means that I receive a commission when products are purchased through links here at this blog (at no cost to you). Please know I will never share or even review product that i would not personally recommend or that I do not personally like.

Leave a Reply