Hidy Ho Stampers,
USE HOSTESS CODE: Z794BUCT
Lots to talk about…first thing TODAY, April 10th IS THE LAST DAY FOR FREEEE SHIPPING!!! click here to shop… www.stampladee.stampinup.net!
1. FREE SHIPPING – Is there ANYTHING you need or want? Save that shipping cost but do it today! This is so exciting. REMEMBER to get all the 2013-2015 In-Color REINKERS, stock up on paper and all the other accessories in that group NOW before they are retired! Don’t be caught short! While you are putting things in your shopping cart, check out the CLEARANCE RACK! and the WEEKLY DEALS Pages also(click on those active links to get to the shopping cart)! Throw a few things in there from those two shops so you save EVEN MORE or order just one thing….NO SHIPPPPPPPING! and FRAMELITS did you see all the framelits on sale!!!!
2. APRIL Stamp Class of the Month – This is a great class if you like different folds and popups! Love this class. Click here (or at the top of my blog is a link that is called “Stamp Class of the Month”)…you can go there to check out the details.
3. Grab and Go Bags – I just received another shipment in. Get yours before this group is gone!
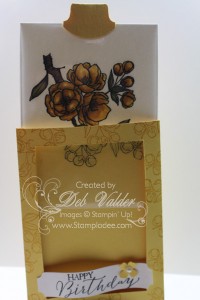
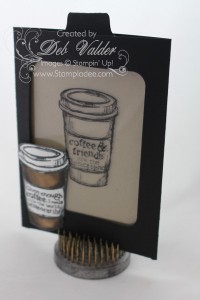
Okay, I think that is all the hot stuff going on that is URGENT!!! Now for today’s really fun card. It’s called “the Magic Window card”.
do you see the “magic” of the card?
It’s just a black outlined image then when you pull it out…
OMGosh! BEEEEEAUTIFUL!
Same here…this is a gift card! I needed one for a dear friend.
What do you think?
Here is the video to show you how to do it! Remember if you are looking at this from your email, make sure you click on the video picture and that will bring you to my blog where you can see the video!
What did you think? See….these types are cards are sooooooo easy!
Take it step by step!
Thank you for stopping by my blog today. Hurry to get your FREE SHIPPING order in today, April 10th! Then check back next week to see what we have for you! MORE FUN STUFF!
Base card is 8 1/2″ x 10 1/2″;
With the 10 1/2″ side at the top of the Stampin’ Trimmer score at 5 1/2″; then (on the same side at the top, cut in from the edge and stop at 2 3/8″; then lift the cutting blade and put it down at 6 1/8″ and cut to the end of the paper.
With the 8 1/2″ side at the top of the Stampin’ Trimmer, score at 2 1/4″ and 6 1/4″ ONLY down to the 5 1/2″ mark.
On the lower half of the 5 1/2″ mark, go in 2 3/8″ and cut from the 5 1/2″ mark down to the bottom of the card base (this piece should fall right off). Place the cutting blade on the 6 1/8″ mark and repeat these steps. You should now have a card base that looks like a “T”.
The inserts are 3 3/4″ x 5 1/8″. See Video for details on how to put it together (https://youtu.be/STGo9Zd8b0E)
HERE ARE ALL THE PRODUCTS USE – these are active links that will take you directly to my online store!


Hi Deb, Thank you for sharing the ‘Magic Window ‘ card. It is absolutely sensational:) I had read a tutorial but it was so much easier when you showed it on video. Just L-O-V-E your videos. Take Care – Fiona, Queensland, Australia