Hidy Ho Stampers,
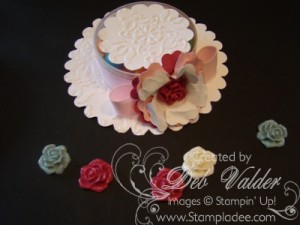
I've been seeing a lot of these Easter Bonnets out there and I just had to make one. Here is my version of the "Easter Bonnet"!
1. I used one of the containers that our embellishments come in (recycling)!
2. The bottom piece is cut from the Big Shot and our large scallop die ##113468 found on page 207. I then ran that through our Vintage Wallpaper Embossing Folder #120175 found on page 214 of the big catalog and adhered that to the bottom of the container with Mini Glue Dots #103683 found on page 197 of the Big Catalog.
3. Next I wrapped around the the sides of the container in our Pretty In Pink 5/8" Grosgrain Ribbon #119956 (I also made the ribbon bow with that ribbon). I adhered the ribbon with Sticky Strip #104294 found on page 197.
4. Next you will see the flowers. They were made with – yes you guessed it – my new favorite die – the Fun Flowers Die #121812 found on page 39 of the Occasions Mini Catalog. I used only the small flower on the die – cut one Rose Red, one Pretty In Pink and one Whisper White. Spritz both sides with water and crunch them up, then very carefully open them up, you want them to still look wrinkled. After they are dry, use your Mini Glue Dots (aka snot dots) #103683 found on page 197 to glue the three flowers together and then to add one of our absolutely ADORABLE Vintage Flower Adornments #121879 found on page 15 of the Occasions Mini Catalog.
5. Now moving on to the top of the bonnet, punch out a piece of Whisper White cardstock with the 2 3/8" scallop Circle punch then run it through the Vintage Wallpaper Embossing folder and adhere it to the top of the container with the Mini Glue Dots.
Isn't it just adorable…hey, this could go along with the sweater I made yesterday!
And look how yummy the inside looks! JELLY BEANS!!!!
I live in Saratoga New York and Bonnets are HUGE here during our Horse Racing Season. Don't ya just love them??!!!
Hope you enjoyed my project. Take care.


Leave a Reply