Posted Best Mail Day Ever Hidey Ho Stampers, June 24, 2025. Today Teaspoon of Fun is bringing you a beautiful “postage”…
Read More

Posted Best Mail Day Ever Hidey Ho Stampers, June 24, 2025. Today Teaspoon of Fun is bringing you a beautiful “postage”…
Read More

NEW Card Kit in Town Hidey Ho Stampers, February 28, 2025. Today Teaspoon of Fun is so excited to bring MORE…
Read More

Magical Friendship Hidy Ho Stampers, June 6th, 2023. Today Teaspoon of Fun is bringing you a beautiful framed watercolor card but…
Read More
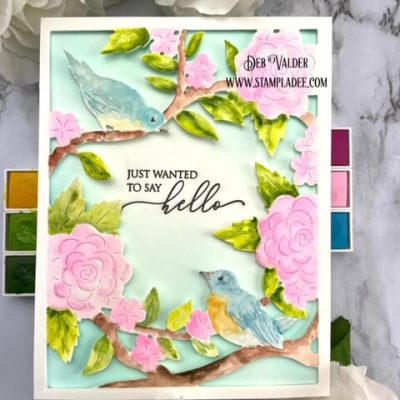
Birds and Flowers Cover Plate Hidy Ho Stampers, Yesterday was the rollout of our SUPER Coupon. Did you get it? …
Read More

Hidy Ho Stampes, More sneak peaks from Continuing Education classes coming up this week. Thank you for taking…
Read More